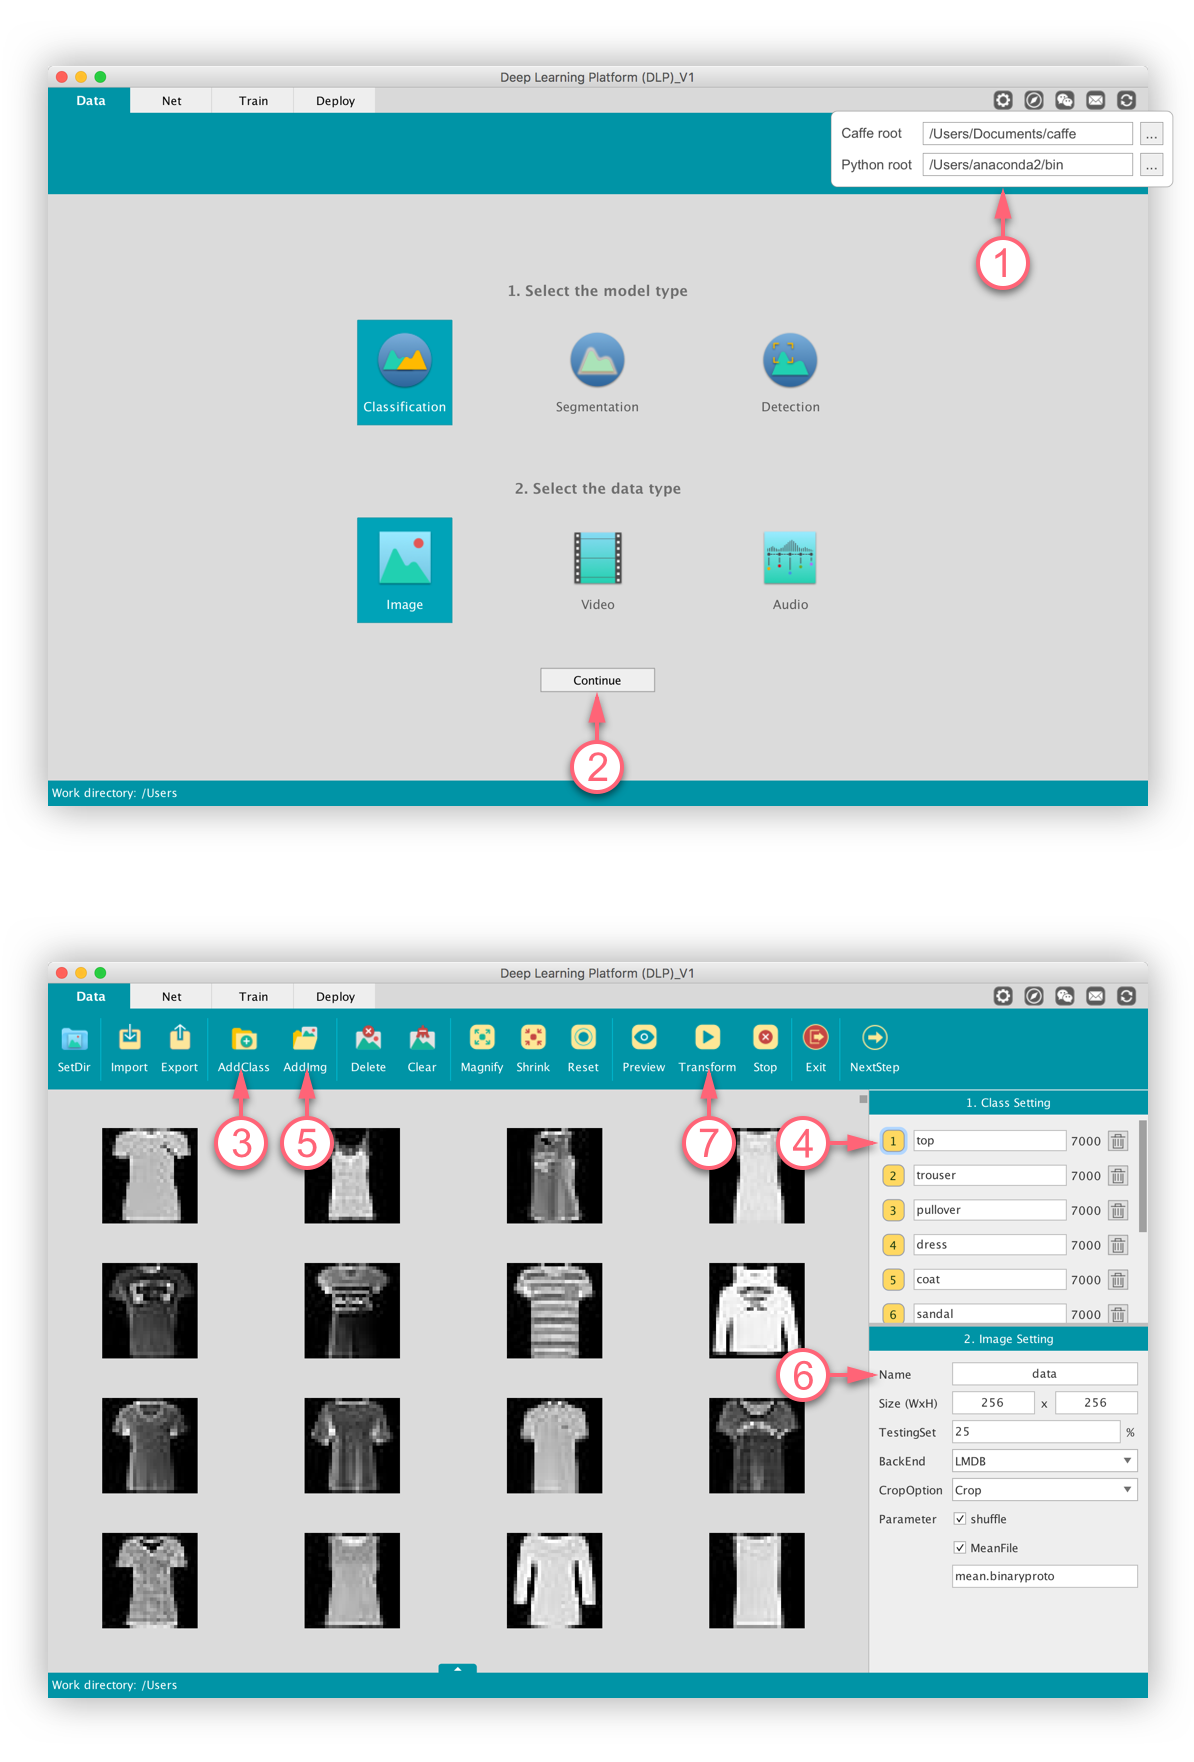
Step 1. Set up the Caffe root and bin directory containing Python. Skip this step if you don’t use caffe for data processing.
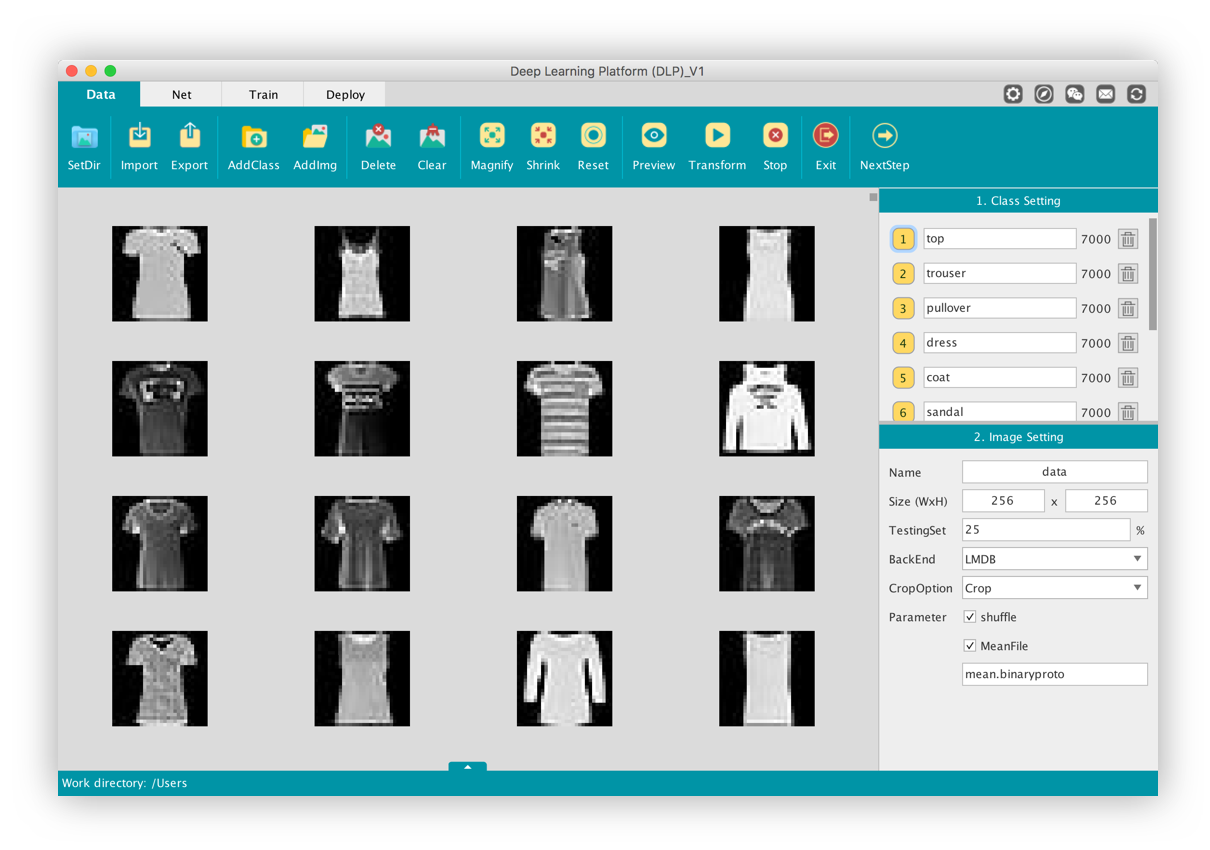
Step 2. Select the model type and data type: Classification + Image.
Step 3. Add classes by clicking “AddClass” button.
Step 4. Fill in the textfield with the label title.
Step 5. With the class button selected, add images to the class by clicking “AddImage” button. Select an image, multiple images, or a folder from the file chooser.
Step 6. Configure the parameters for image conversion.
Step 7. Convert raw images into another data type on which Caffe can train.
(1) Import & Export: export your organized data, and import your existing organized data.
(2) Delete & Clear: delete selected images, or all images by clicking “Clear”.
(3) Magnify, Shrink & Reset: image operations.
(4) Preview: Preview the transformed images.
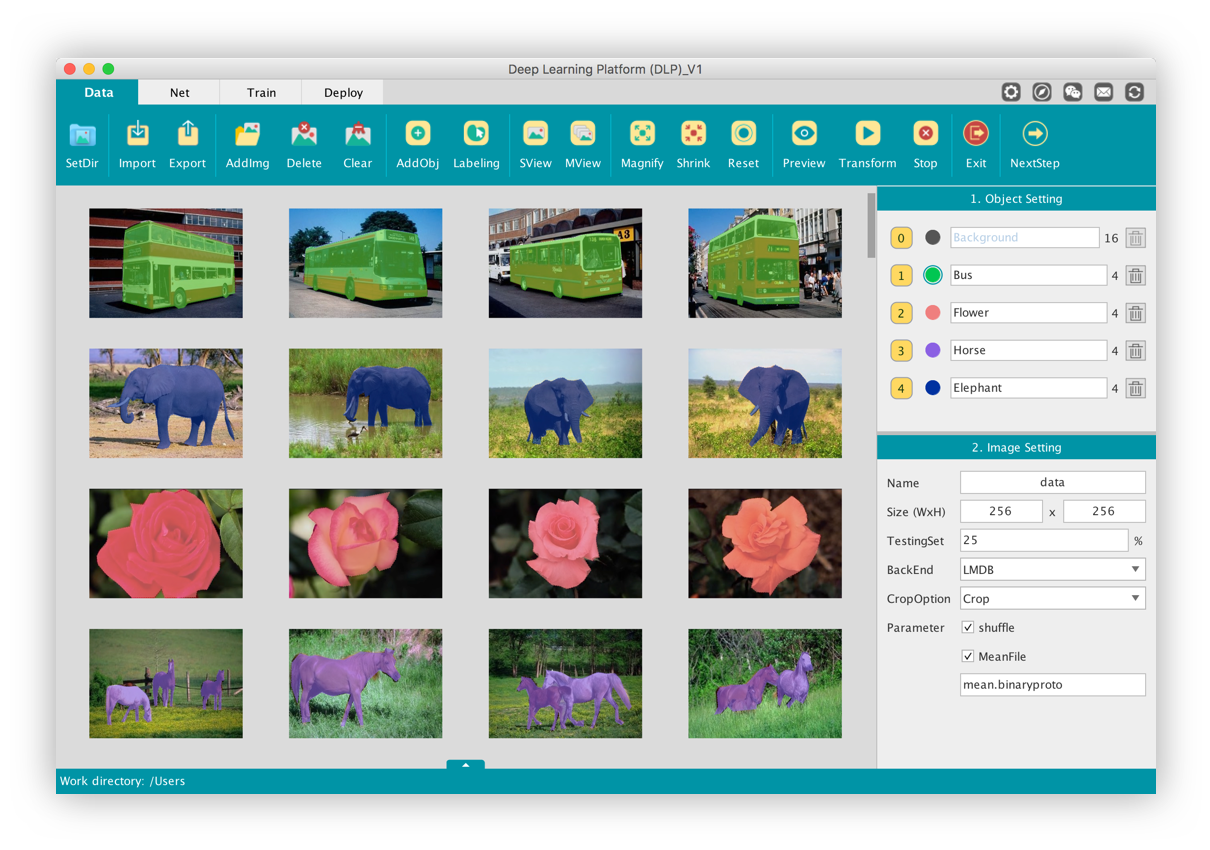
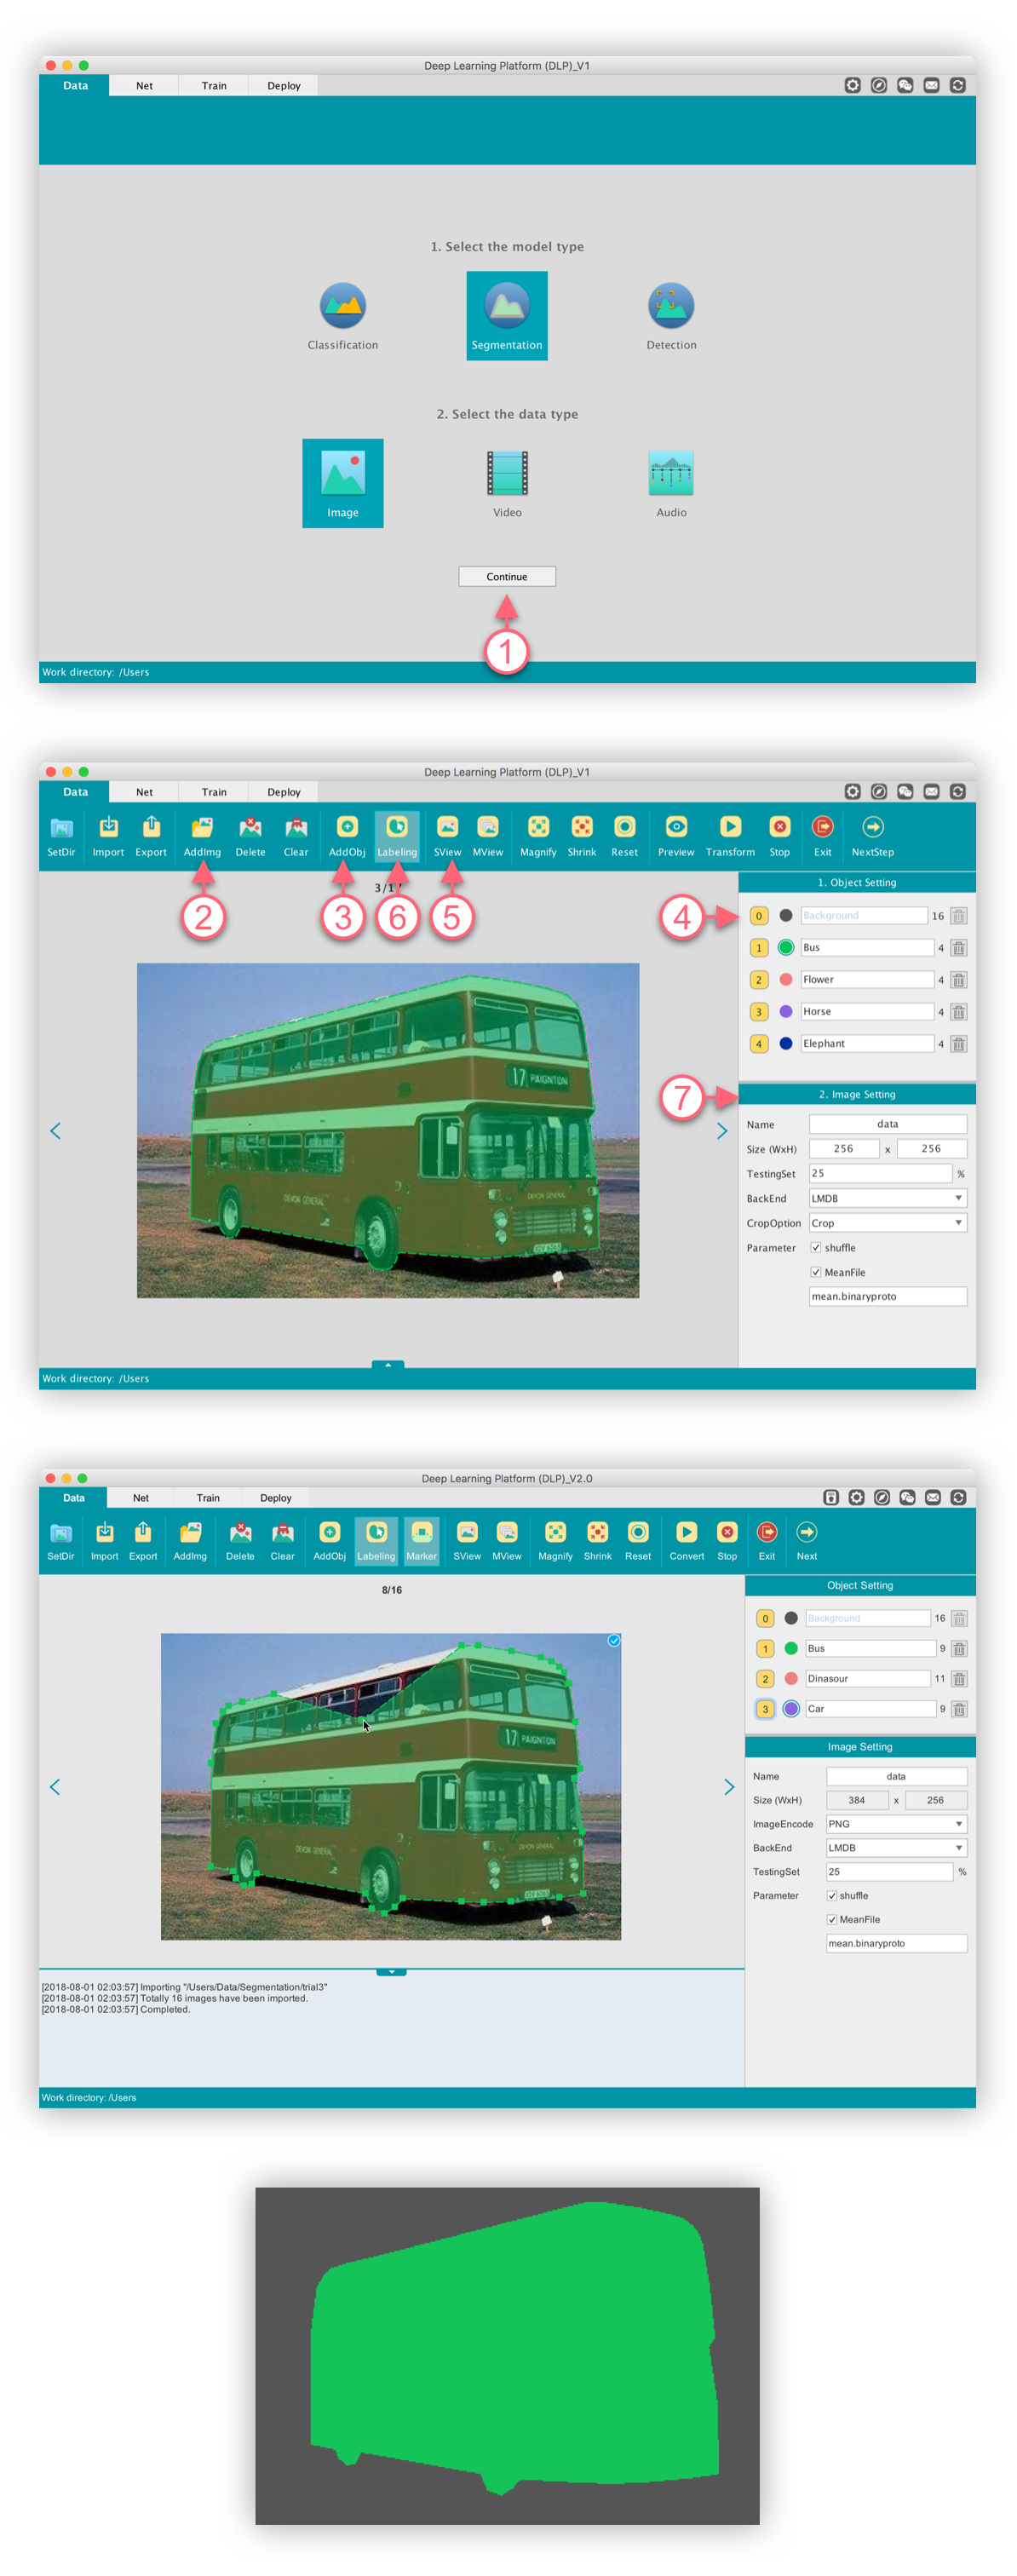
Step 1. Select the model type and data type: Segmentation + Image.
Step 2. Add images to the workspace.
Step 3. Add objects by clicking the “AddObject” button.
Step 4. Fill in the textfield with the object title. A predefined color will be assigned to the object.
Step 5. Switch the view mode from “Multiple” to “Single”.
Step 6. Enter “Drawing” mode by clicking “Labeling” button. Double click on the images with left mouse button and start drawing. Add a key point by one left button click, and remove a key point by one right button click. Double click again to finish drawing.
Step 7. Transform the raw data and drawings into another data type with which Caffe can run.
(1) Import & Export: export raw images and labels. When importing, your drawings will also be loaded so that you can easily modify.
(2) Delete & Clear: delete selected images, or all images by clicking “Clear”.
(3) Magnify, Shrink & Reset: image operations.
(4) Preview: preview the transformed images.
(5) Group labeling: collect labelings from multiple users, and make a complete dataset.
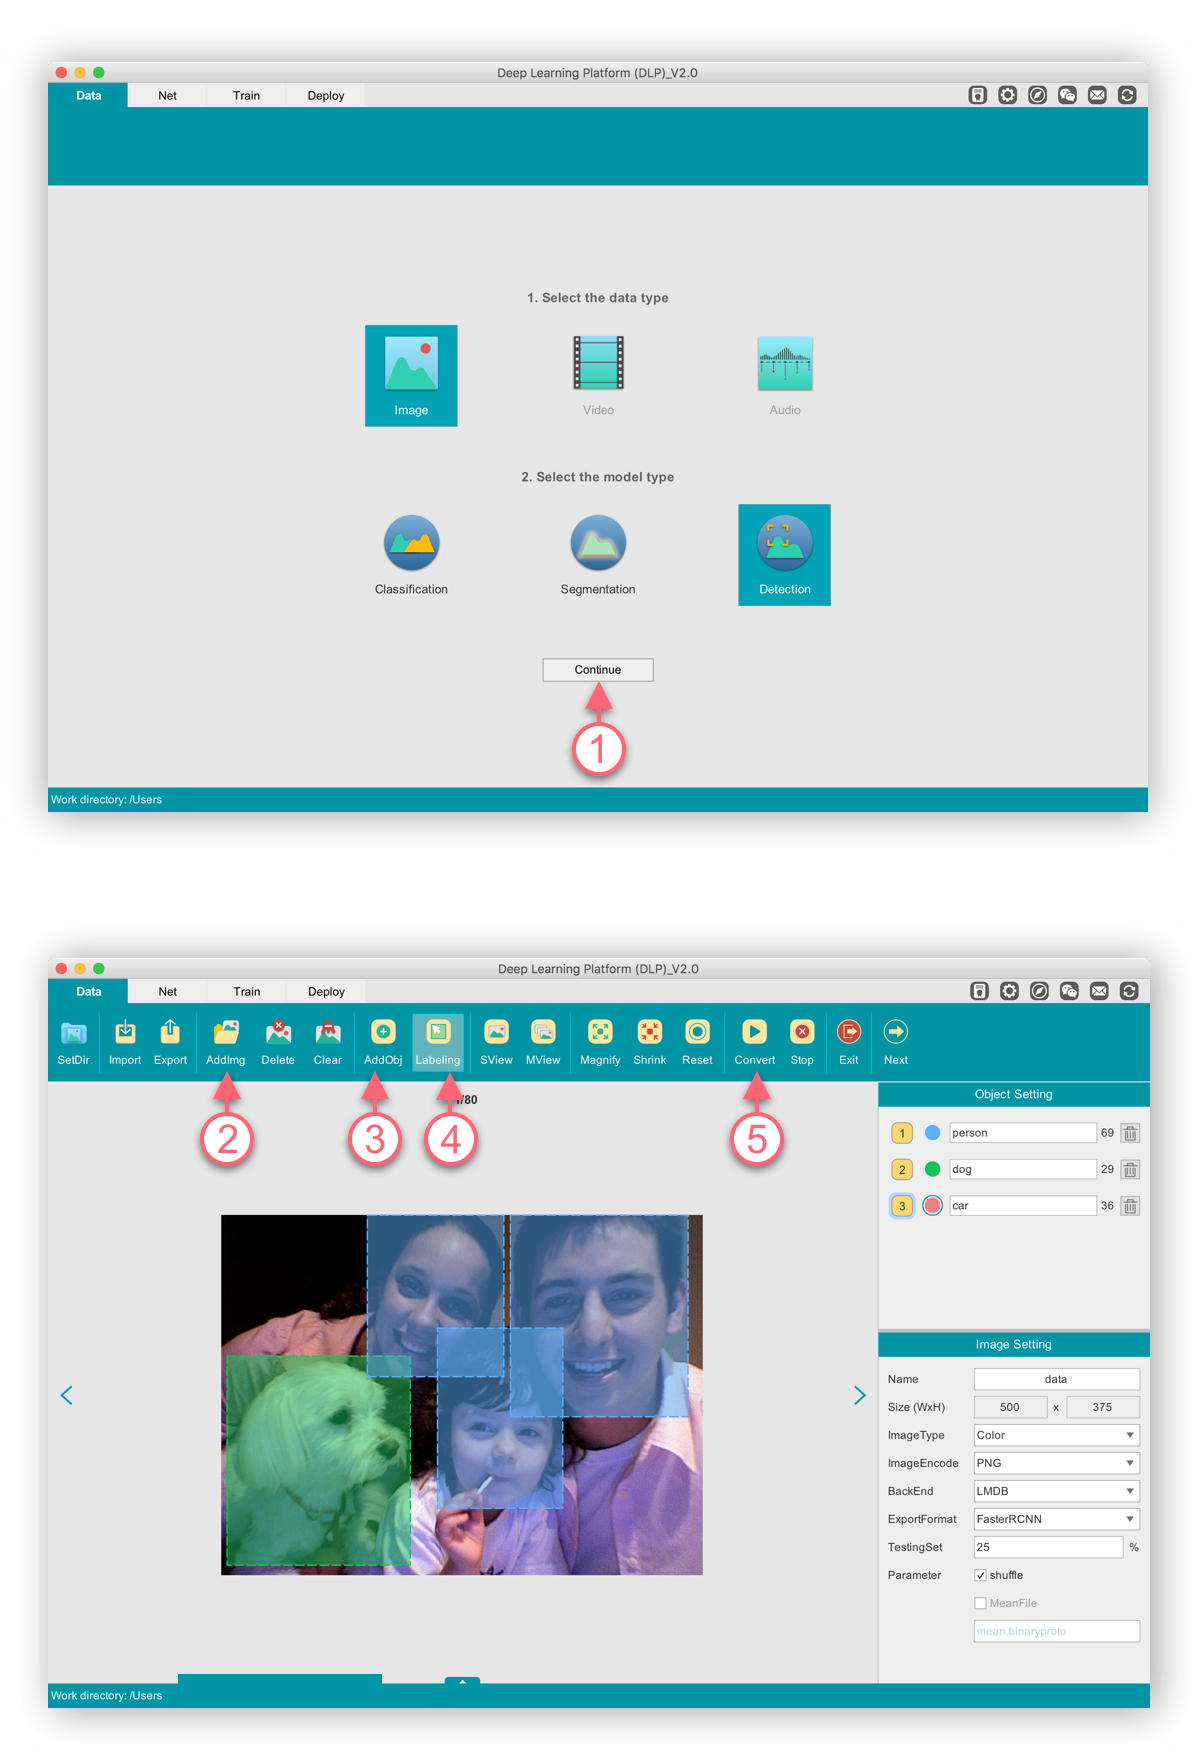
Step 1. Select the model type and data type.
Step 2. Add images to the workspace.
Step 3. Add objects by clicking the “AddObj” button, and fill in the textfield with a object title.
Step 4. Enter “Drawing” mode by clicking “Labeling” button. Click on the image with left mouse button to start drawing, and click again to finish drawing.
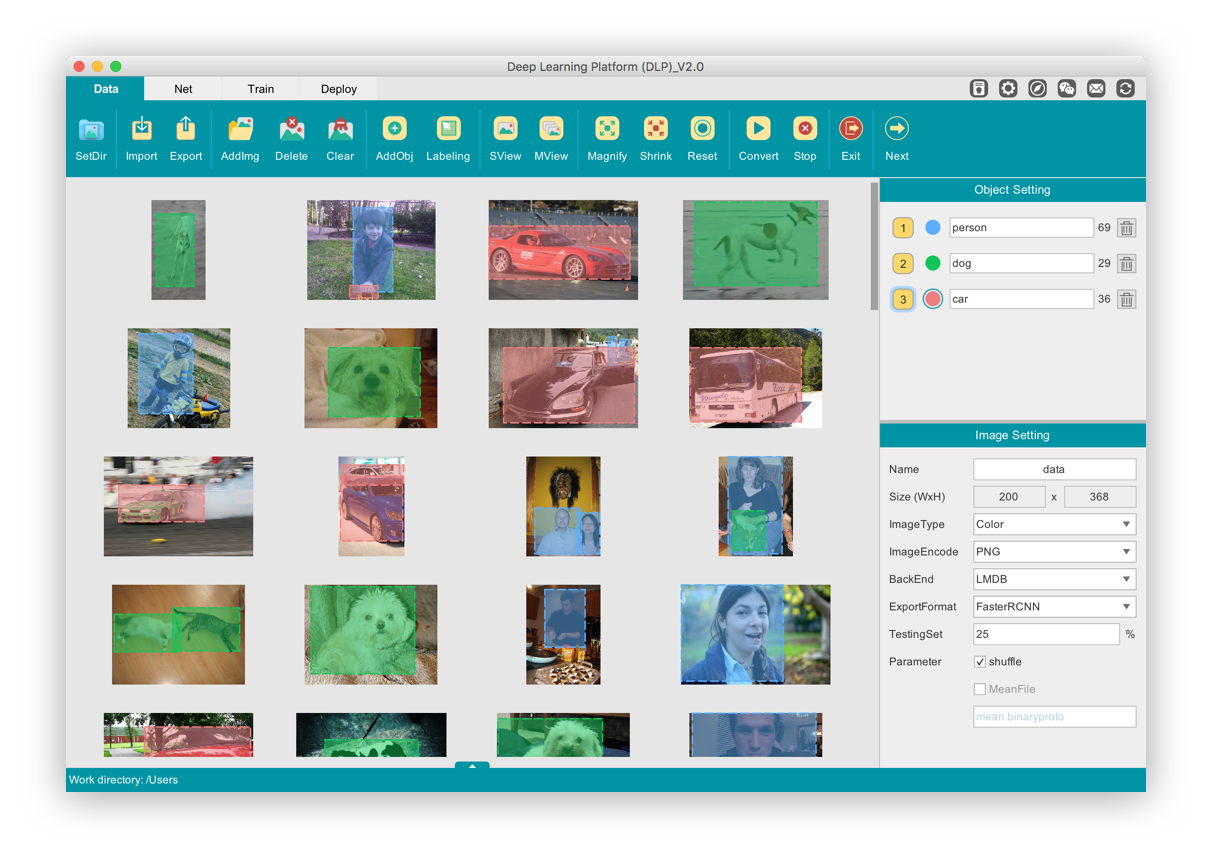
Step 5. Convert labeled data into another data type with a specific export format.
(1) Import & Export: export your organized data, and import your existing organized data.
(2) Delete & Clear: delete selected images, or all images by clicking “Clear”.
(3) Magnify, Shrink & Reset: image operations.
(4) Operate labels: Move mouse to edges or corners of any label, and change the shape of the label by dragging mouse.